Tips for Creating Great Email Templates
14 Apr 2020
When it comes to creating great email templates, there is a lot you have to consider in order to make sure you get the tone and design right.
It may sound obvious, but the first step in building an email template is deciding what you want to say.
You don’t necessarily need a full draft at this stage, but a general idea of how much text you’re going to be adding is important. It’s also a good idea to have a general idea of what kind of media you want to add: images, links, videos, gifs, etc.
Once you have an idea of what the email will contain, it’s time to start designing.
Sketch out your design
I’ve got some more specific notes below to help you when it comes to formatting depending on what kind of email template style you’re going for.
But for now, I’m going to suggest you start by taking out an actual piece of paper (or load up Paint if you want to stay green) and actually sketch out what you want your email template to look like.
Think about all the elements in your template strategy that we discussed before. If you’ve got images, where are they going? How much text is there going to be? What will the footer look like?
These are all questions you will need to ask yourself and (trust me) it’s better doing this somewhere you can jot down ideas and change them up quickly.
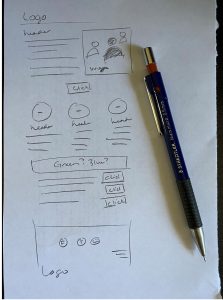
I usually make a quick draft for myself on my notepad…something as rough even as this!
Then I take this rough sketch to show anyone else I’m working with on the template. They know this isn’t the finished article, but we can start to get an idea of what might be missing or what might not look quite right before the real work starts.
And then, once we’re all happy with the general layout of the email template, it’s time to start pulling together all of the pieces.
Assemble your email template tools
The time has come to bring all the elements of your template together, ready to be combined into the masterpiece that will be your email.
So, what elements will you need?
- The text of course
- URLs
- Resized images
- Email builder
- Testing facilities
- Distribution
I’d like to briefly go through each of these elements to discuss what I mean by them and a few tips I can offer on the best way to approach each.

Do we have what it takes?
We don't restrict which features you have access to in OpenCRM based on how many users you have. You get everything right out of the box. Click to find out if we've got the features you need.
find out moreEmail text and URLs
Now’s the time to write out your full email. I recommend using your standard word processor to catch any typos and grammar issues. You don’t want to find these AFTER you click send to 500 or more people!
It’s a good time to get all of your URLs ready to go and copied into a central place. You don’t want to go searching for them later.
At this stage, I usually also build my click through tracked links as well, just to save myself a job further down the road.
Call to Action
Deciding what you want people to do when they read your email is really the heart of the template building strategy. Do you want replies? Should the be clicking a link? Downloading an attachment?
Spending some time (and having some dialogue) around this point is never wasted. You may also want to start putting together that landing page or attached file as you build you email template. This will ensure that the style is carried through, making your marketing and/or communication materials look and sound like they are coming from the same place. Which of course they are.
Making a decision here will also really inform the whole design of your email template.
Colour and Images – Size Style is everything
If you are adding any images or colours to your email templates, this is also a good time to get all your ducks in a row.
With colours, get the RGB or HEX codes written down somewhere, with clear labels. You might even add this to your sketched design if you are doing something complex. Once again, this is just to make your life easier when it comes to the actual build.
A word of caution about images now. Whether your building the email yourself or using a drag ‘n’ drop creator (more on this next), please please please make sure your images are the right size. Don’t rely on styling and creators to resize them properly.
This may look like it’s working, but there’s no guarantee that all email clients are going to read the instructions to resize.
Afterall, you’ve received emails with ridiculously large images in them before and you don’t want to have the same happen in your template.

Let us take you on a tour
You've had a look around and are starting to think OpenCRM might be the system for you and your business. Why not chat with one of our team (and ask your burning CRM questions) as they take you on a tour of the system?
find out moreThe question of building sites
And now it comes to building the email…but where are you going to go?
The way I see it, you have two options:
Option 1 – Build it yourself manually using HTML and CSS code.
This is a great option if you know a lot about how different email clients process emails.
It’s also great if you have an existing template that you just need to tweak.
But if you aren’t 100% confident, I would always recommend going with Option 2.
Option 2 – A drag ‘n’ drop creator
If you aren’t as confident in your coding abilities or just want to put something together quickly, using a drag and drop creator is a great solution.
We have several that we recommend, including Bee Pro, Chamaileon, and Stripo.
These are perfect for quickly building an email template, which you can then export as the HTML code, paste into a service like OpenCRM, and then you’re on to the next step. (Watch our video below to learn more about how to do exactly that with Stripo.)
Test, test, and test again
Now that you’ve got your template built and it looks perfect on screen, you may be tempted to just click send.
Please don’t. Please test the email in as many different email clients as possible. Why I hear you ask?
Different email clients (Outlook, Gmail, etc.) will process your template in different ways. This can result in them looking very different or even breaking completely in certain circumstances. So testing is key to ensuring that your recipients receive the beautiful email you designed.
You can do this by signing up to free accounts in a variety of clients or signing up for a dedicated testing service like Email on Acid or Litmus.
But I really recommend testing your templates, I cannot stress that enough.
Time to hit send
Once you are happy with your template and happy that everyone will receive an email that looks like your design, it’s time to actually hit send.
But where are you sending from?
Obviously I’m going to suggest you send from a CRM solution like OpenCRM, where you can hold ALL of the email templates you’ll ever need right alongside all the Contacts and Leads you’re sending them to…with a full history of your communication with these individuals available at the click of a button.
But it’s not the only solution, of course. There are tools (like MailChimp and Campaign Master) that focus solely on sending out emails…that’s really all they do. And a lot of people prefer using these for their bulk email campaigns.
Either way, you’ve now sent your beautiful email template and can just sit back and watch the clicks roll in.

The salesforce alternative?
There are a lot of a CRM providers out there and it can be difficult to know how one compares to another. Click to find out more about how we stack up against the competition.
find out moreThe right email template design
Going to go back a few steps now and talk a little bit about the design and build stages in a bit more detail.
Picking the right design can be tricky, it has to fit your company branding as well as the message you want to send. After all, you would want to send a more whimsical styled email with lots of fun pictures if the message itself is very serious.
So how do you pick the right style to fit your message and your company? And then how do you actually build it?
I’m going to go through what I see as the main three types of email template to explore when you might want to use them and offer some tips on how to approach building them.
Going for elegance and simplicity
Sometimes simple is best. I find designing templates without images (except for maybe the signature) can really help focus the reader onto the message of the email.
These simple templates will have a bit more about them than just your normal default emails, but will probably still have a lot of “white” space and maybe just a few accent colours or lines to break them up.
So for example:
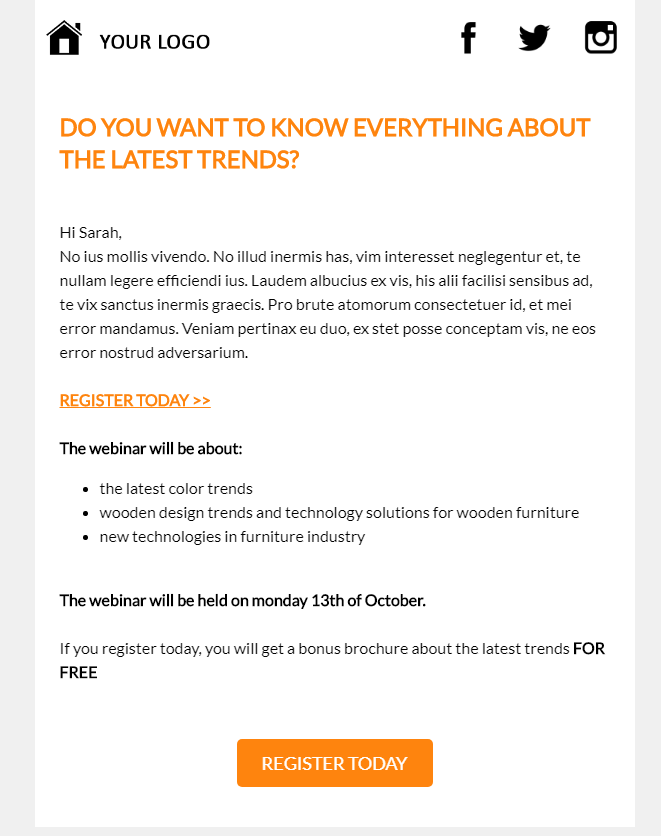
To build a template like this, I would start by focusing on my text. Create a blank space and stick all the text in there. Then I’d start playing around with a call to action (CTA), if needed. After the text, this is the thing I want to focus my readers’ attention on.
Once I was happy with those two, I’d move to exploring secondary CTAs in the footers. These may be your social media or website links. You don’t want these overshadowing the main call to action, but should still be clear and obvious.
These secondary CTAs will really inform the design of your footer…which will then help you settle on any header you might want.
The key to an elegant email template is using a lot of white space, a small amount of a bright or otherwise obvious accent colour for your CTA, and then one other background colour for your secondary CTA and footer—usually grey or black.
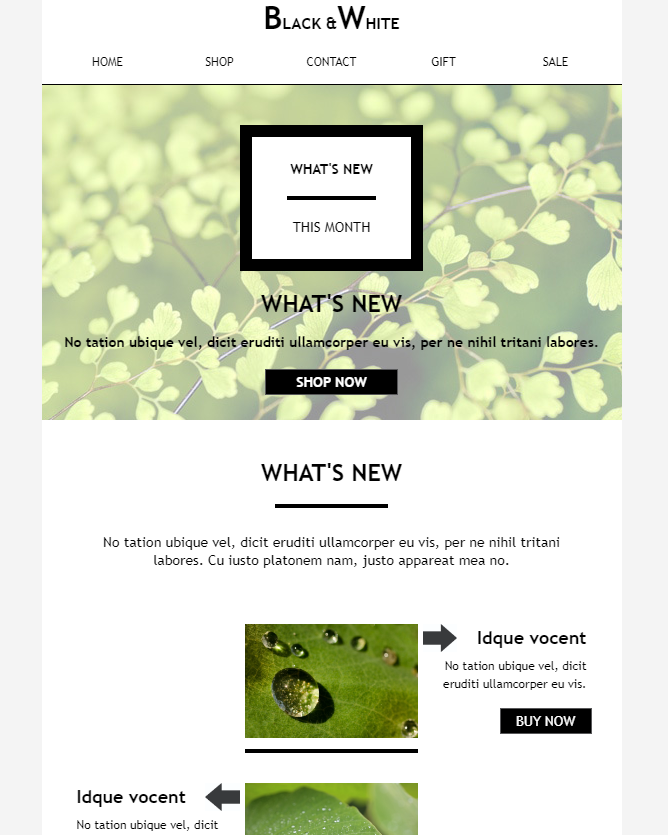
Image and media rich
When I’m designing an email template that is full of images, blocks of colour, and generally jam packed with stuff other than text, the key for me is balance.
You don’t want too many images too close together, because then your email looks busy. At the same time, you don’t want too much text all together because that can make readers scroll through it too quickly in a rush to look at the great images.
So when I start designing these busier templates, I tend to start by building the framework of the email top to bottom. I set out a gap for a header, then gaps for the various images and text, and finally the footer. I won’t add any text or images as I go, I will just focus on the layout.
The result will look a bit like this:
Now I can play with the design very easily, moving stuff around without worrying too much about accidentally breaking up or miscopying the ACTUAL text.
Once I’m happy with my layout, I can populate it with the images and text I plan to send out for real.
Like balancing out a seesaw, you want to make sure you don’t go too heavy with text, images, or CTAs. Or you’ll just tip your readers right into their next email.
You can also then start thinking about who should be in the “from” address, which email address it should go to, and whether anyone should be CC’d or BCC’d into it.
If you’d like to learn more about our email template functionality, check out this Tuesday Tip.
Although I originally hail from northern California, as soon as I arrived in Yorkshire I knew it was the place for me! At OpenCRM, I started out in the Business Development team, and then moved into compliance and Q&A because I love telling people what to do…ok, that’s not the real reason, but it makes for a good bio one-liner. When I’m not in the office, you can usually find me tramping through the dales, crafting, gardening, or with my nose in a book.